Getting Started
Installation
To install the theme, follow these setups:
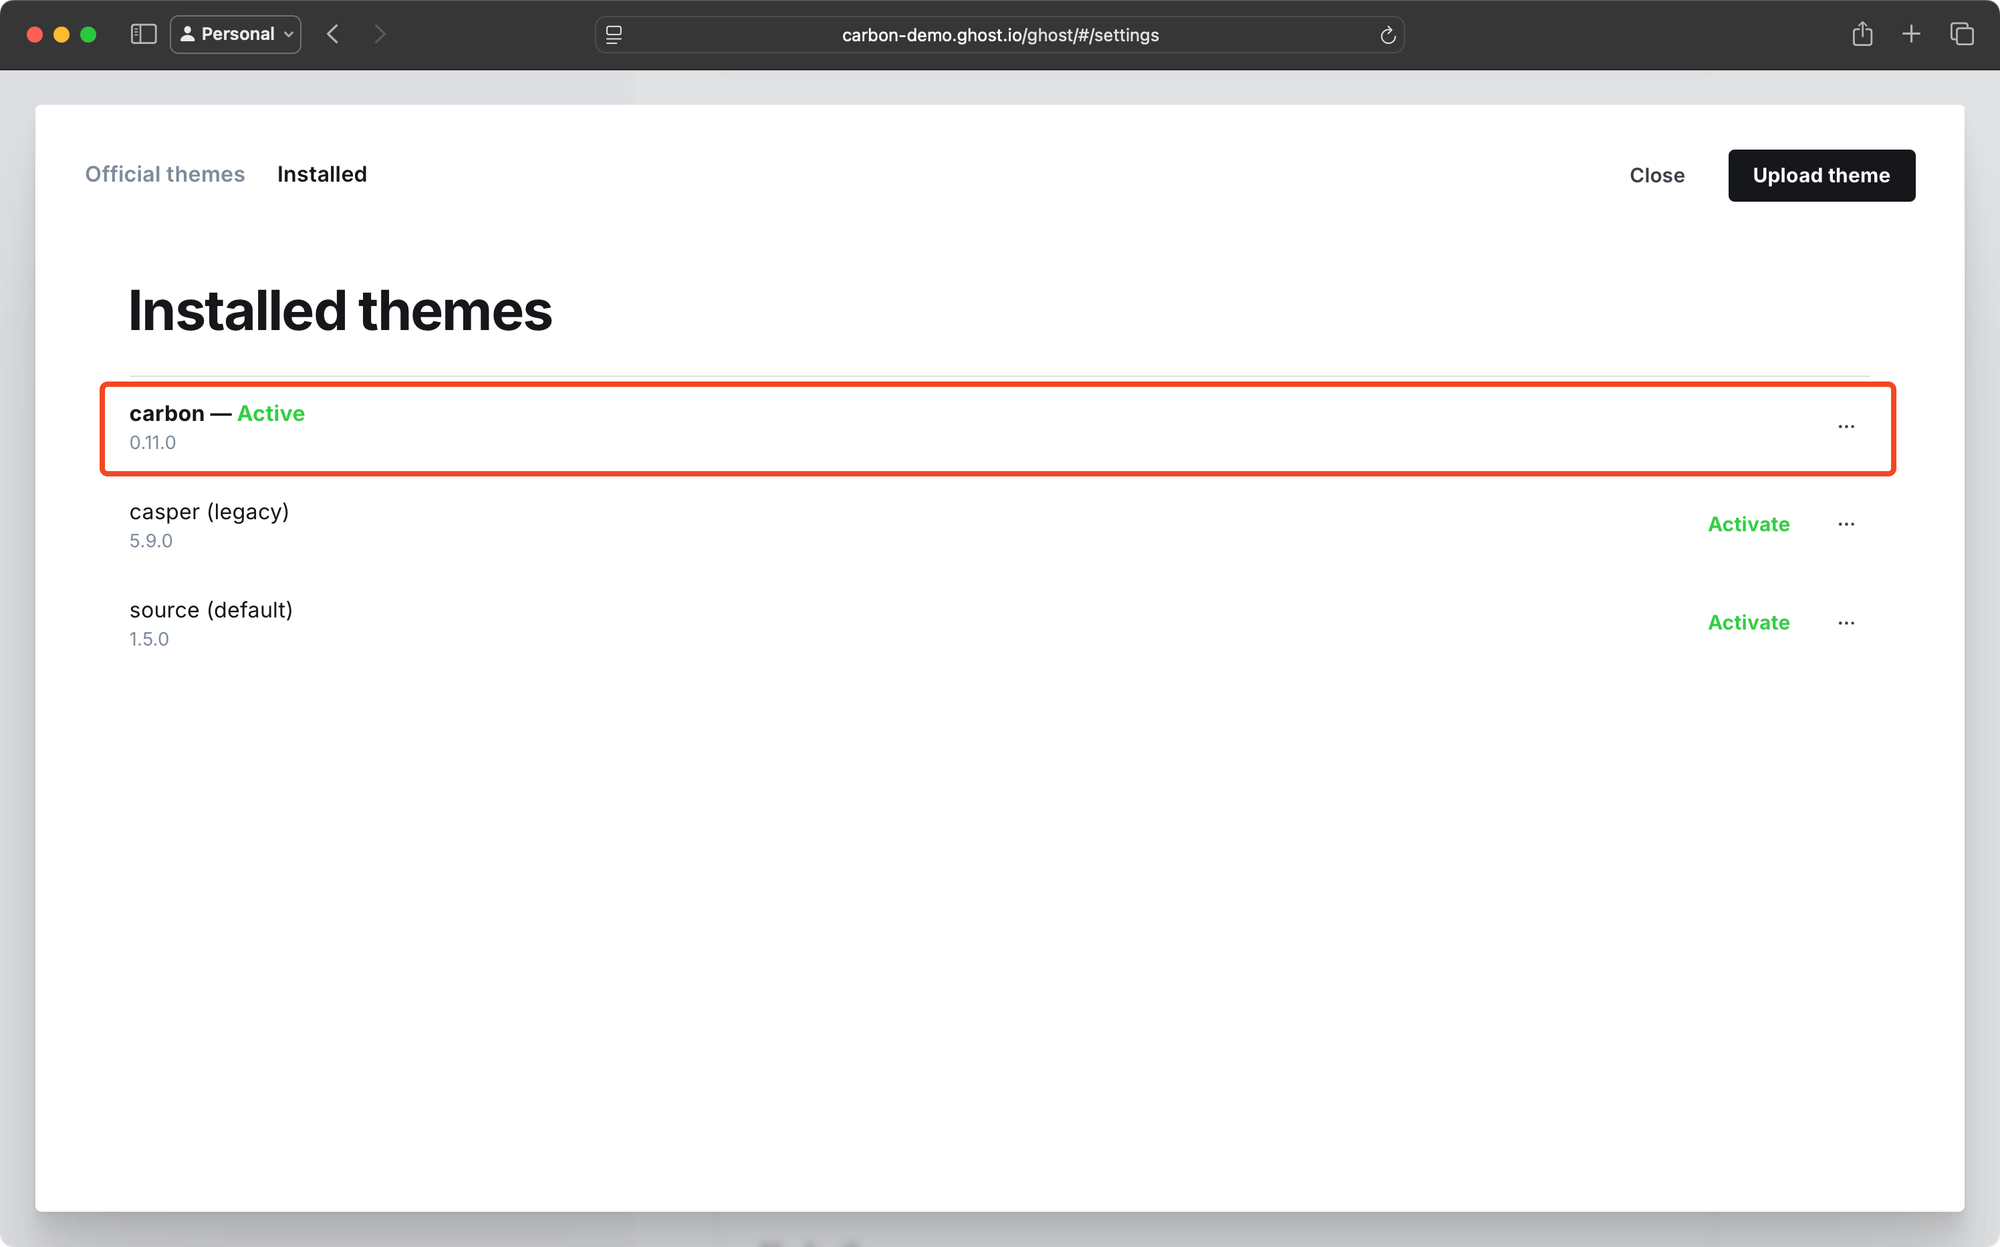
- Log in to your publication admin section at
yoursite.com/ghost/ - Go to Settings > Site > Theme (
yoursite.com/ghost/#/settings/theme) - Click Change theme
- Click Upload theme and select
carbon.zip. - Wait for the theme to upload and click “Activate”.
Routes setup
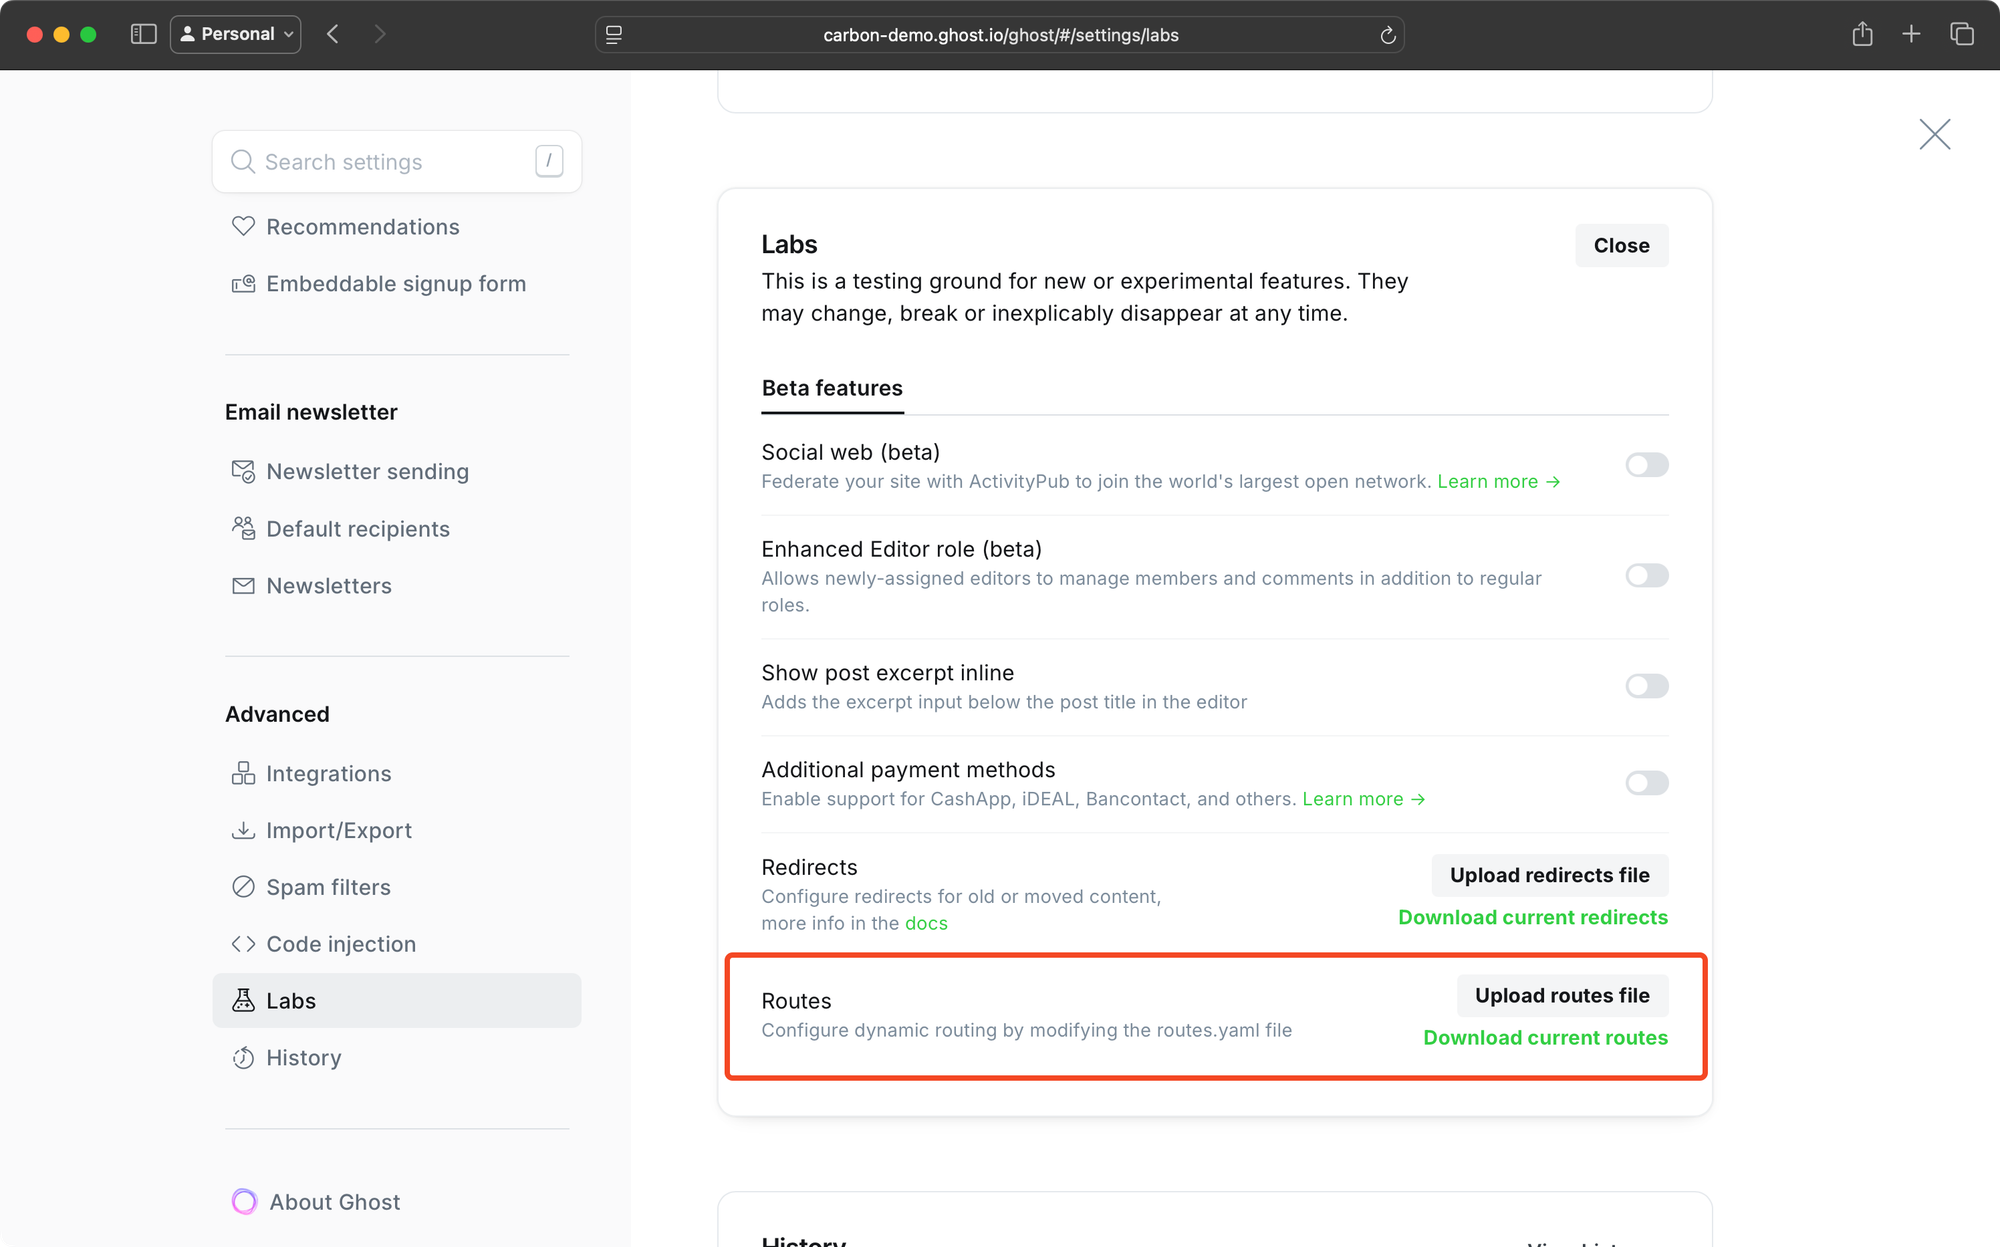
routes.yaml file. It comes with the theme.- Unzip
carbon.zip - Log in to your publication admin
- Go to Settings > Advanced > Labs (
yoursite.com/ghost/#/settings/labs) - Click on “Open”, then “Upload routes file”
- Upload the
routes.yamlfile located inside the theme folder.
Customize Options
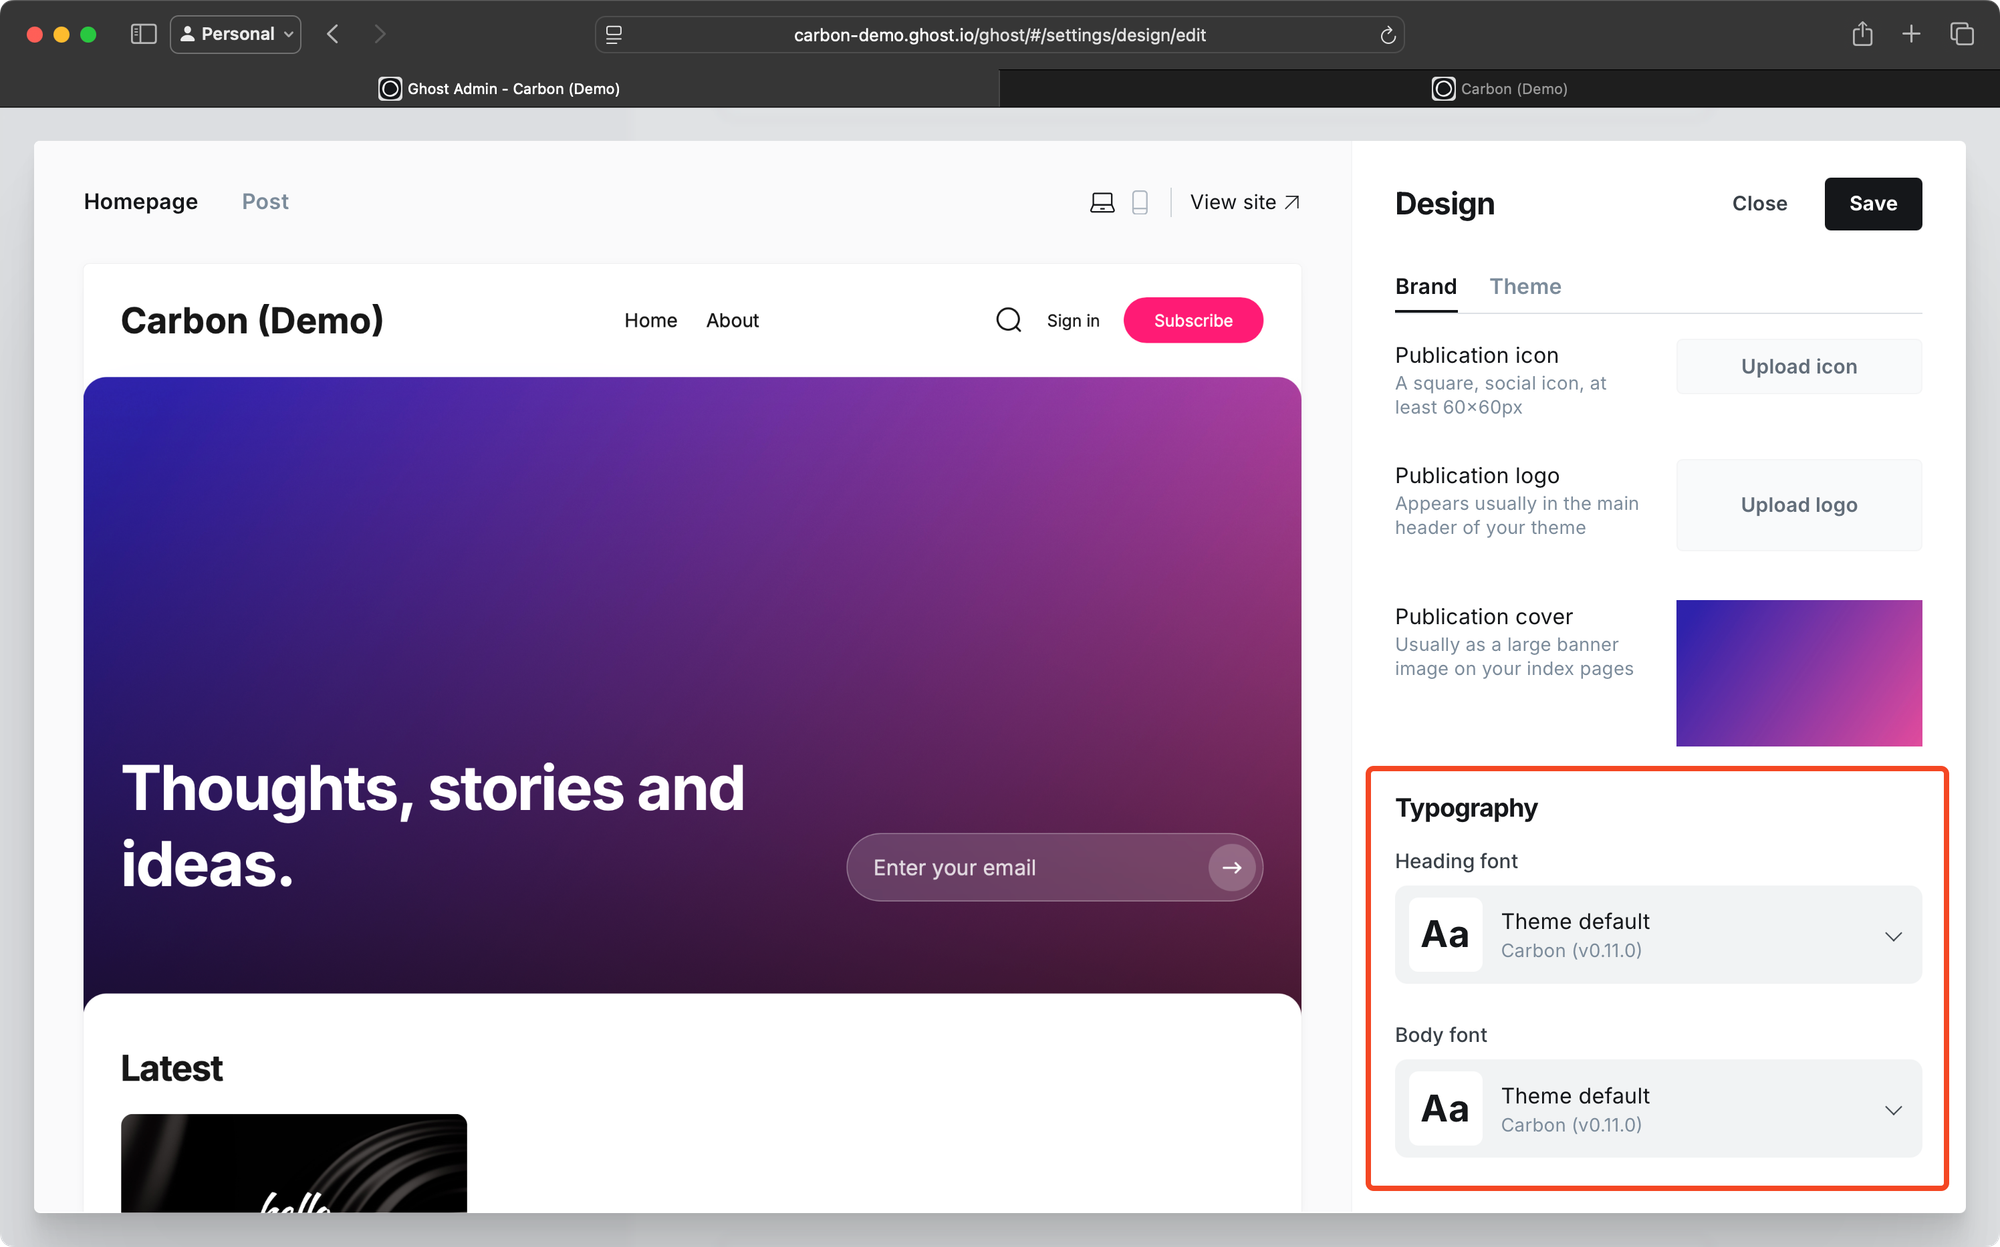
Carbon comes with native support for Ghost’s custom settings, which you can tweak directly from the Admin panel. (yoursite.com/ghost/#/settings/design/edit)
Here are all the available settings that you can tweak to your heart’s content:
Site wide
- Foreground color: Text color of the site
- Background color: Site wide background color
- Footer background color: Color used in the footer section
- Footer text color: Text color of the footer section. Using this, a secondary color is automatically to give the footer a depth effect.
- Accent contrast color: This is color that’s used on top of the site accent color (on buttons, forms, etc.) Typically a shade of black or white would look good, but chose something that contrasts with the accent color.
- Font heading: Font used for the headings (
h1–h6tags) - Font prose: Font used for the post content
- Font body: Font used everywhere else
- Footer logo: Logo to use in the footer section. Must contrast with Footer background color. If not uploaded, the theme will create one.
- Custom CTA text: Add a custom call to action in the header, or leave blank to hide.
- Custom CTA link: Self-explanatory :)
- Footer email capture text: Text for the email capture form in the footer of the site.
Homepage
- Custom hero headline: Set custom headline for the site’s hero (HTML is OK), or leave blank to use the site’s description.
- Hero content position: Carbon offers two hero options – center and bottom. Here’s how they look:
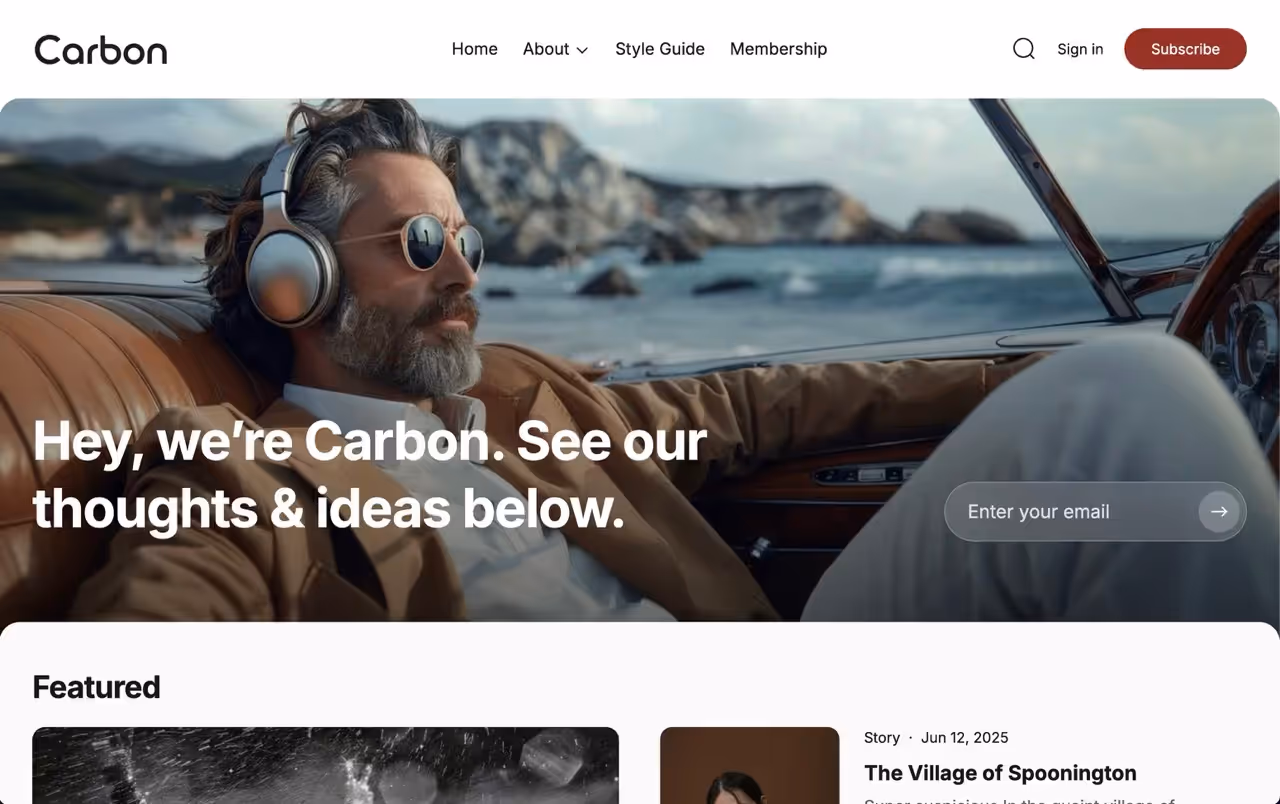
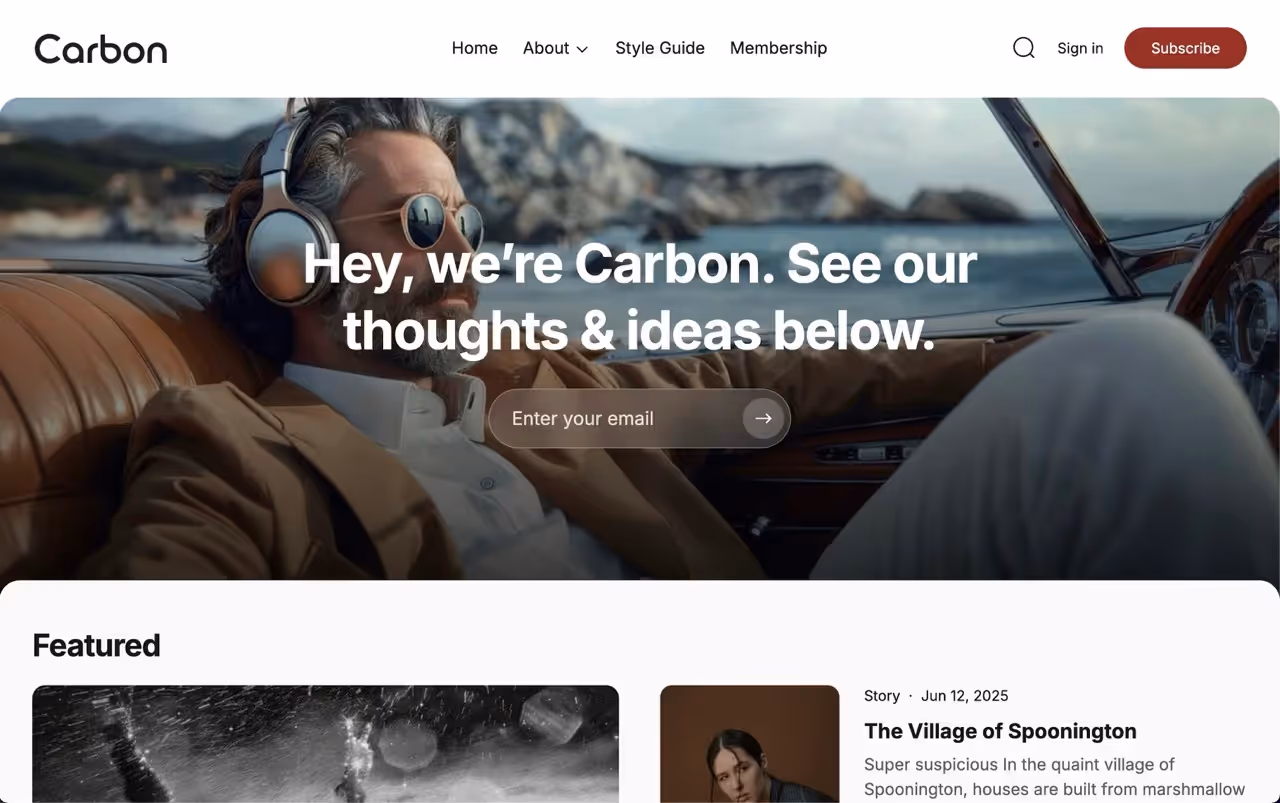
Bottom (left) vs Center layout (right)
- Hero overlay color: Controls the darkness of the overlay applied to hero images for accessibility and text legibility. Increase opacity for better text contrast and accessibility, or decrease for a lighter appearance.
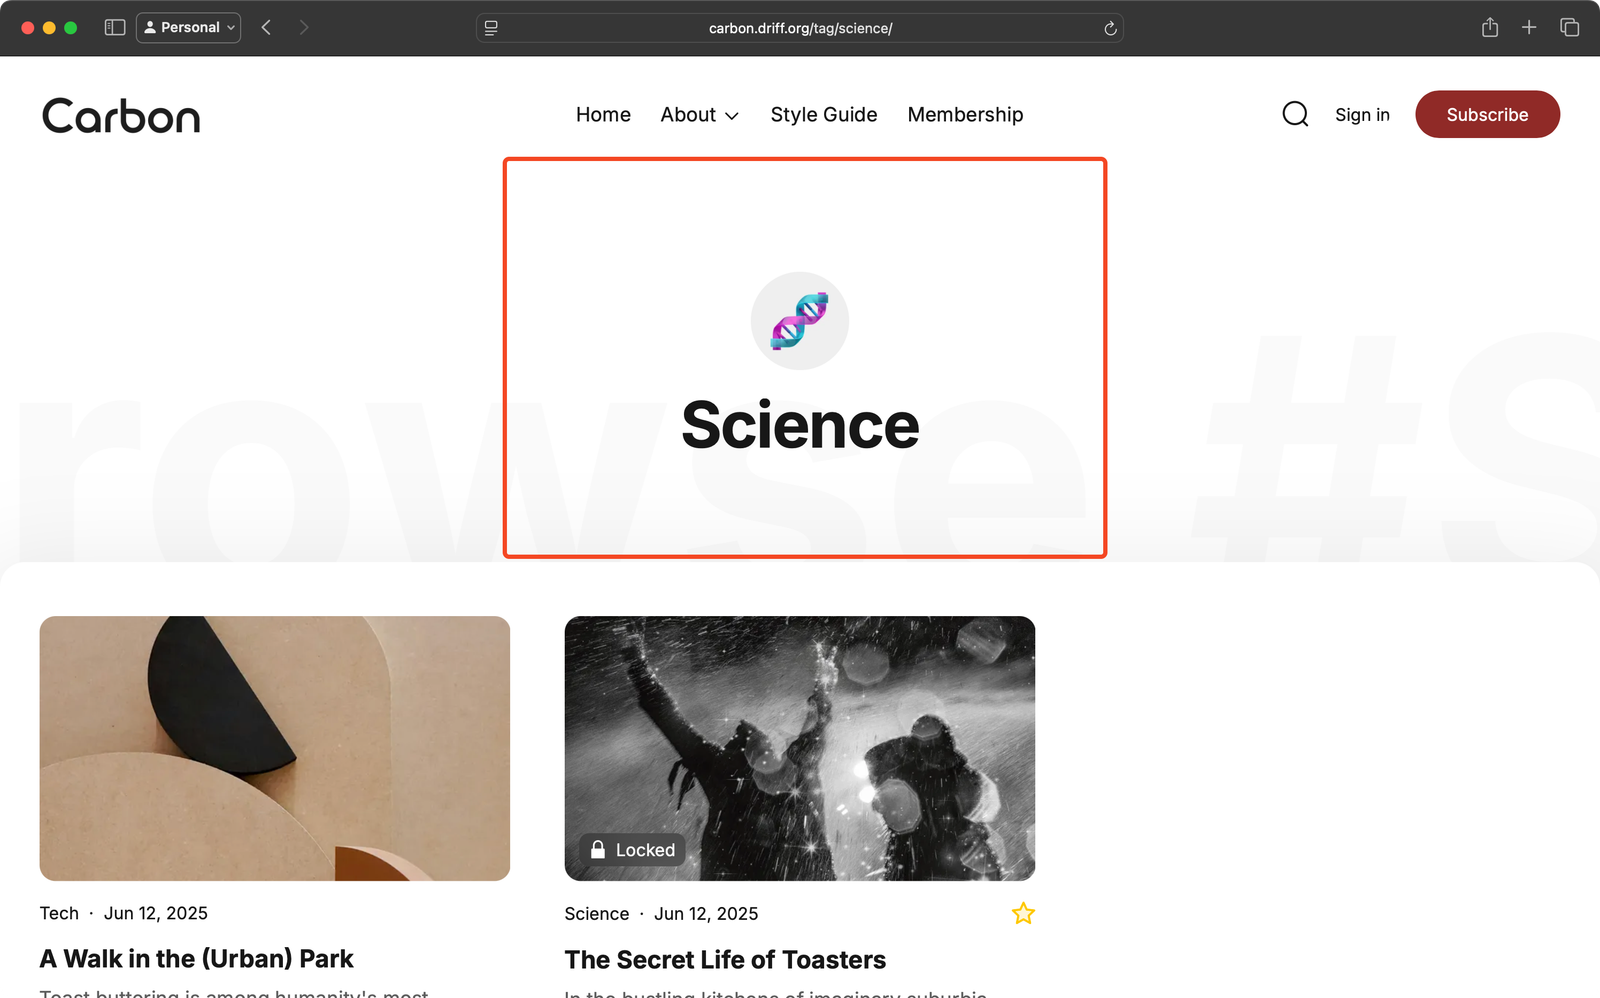
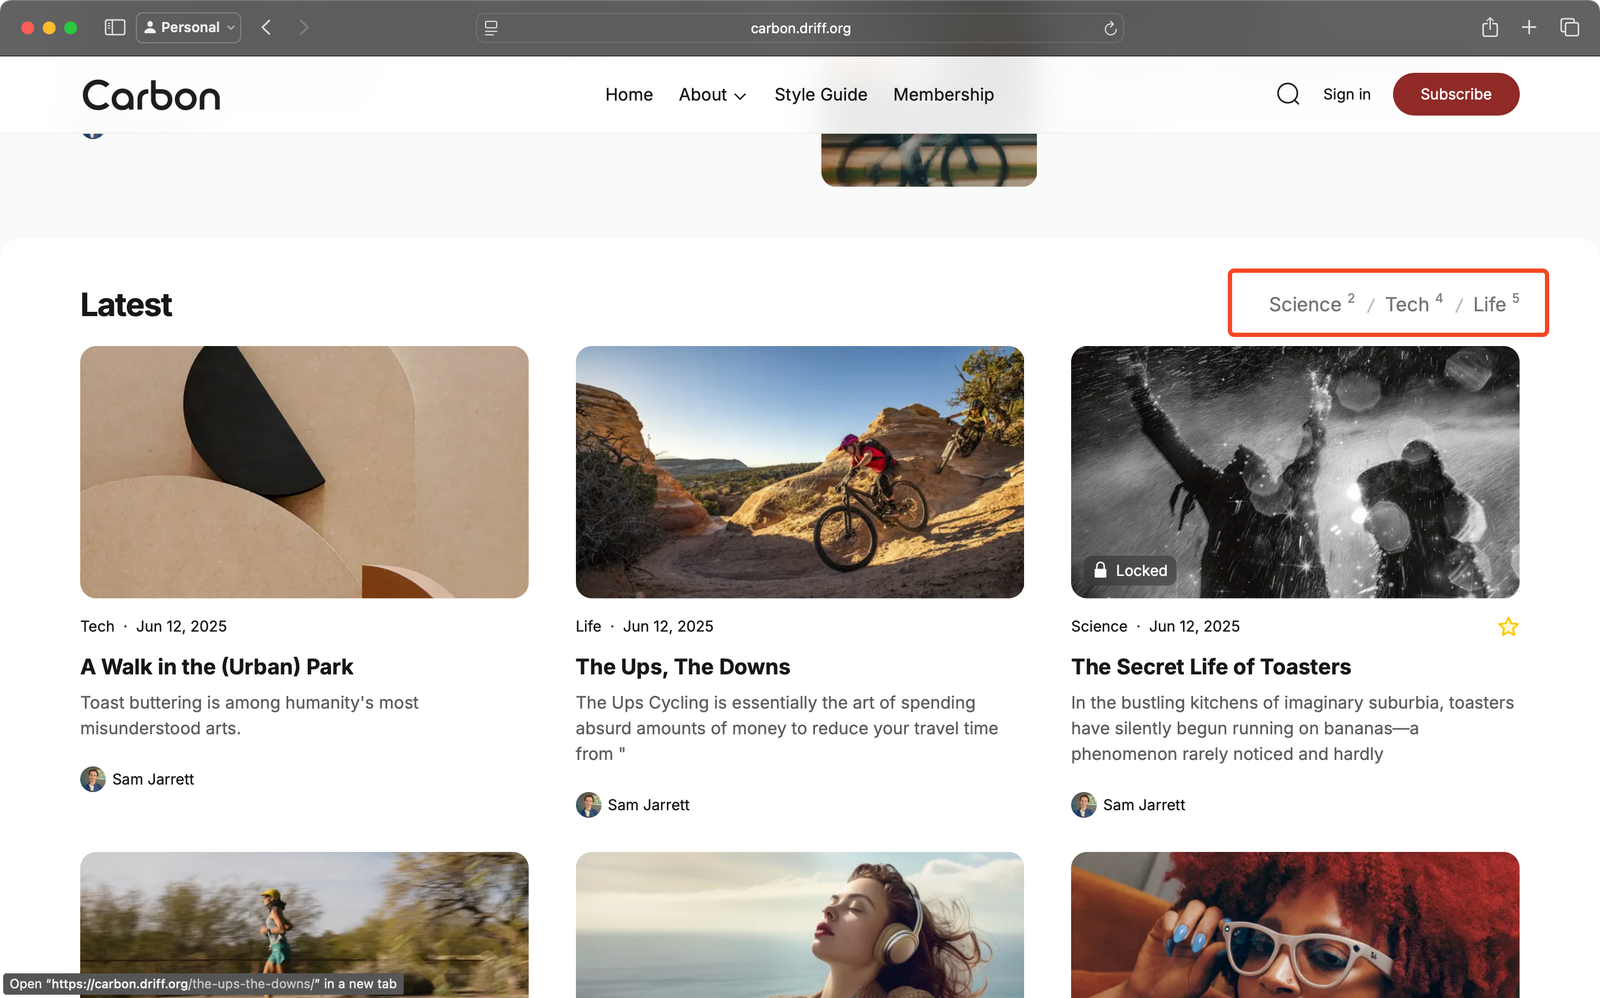
- Featured tags: Featured tags appear in the footer as categories & on the homepage as “Quick links” bar. Enter tag slugs separated by commas with no spaces (e.g.,
science,tech,life). Find tag slugs in Admin > Tags. Limit to 3 tags for best results. - Sticky header: (Only applies to Desktop; the header is dynamic on Mobile) Whether the navigation bar stays in place even as the user scrolls down.
- Featured tags count: Whether to show the number of posts for each featured tag in the “Quick links” bar.
Post
- Show table of contents: Set the default for whether to show table of contents on posts. You can override this using custom styles to display table of contents on certain posts and hide on others. On pages, however, the table of contents defaults to hidden unless specified otherwise using custom styles (more info on below).
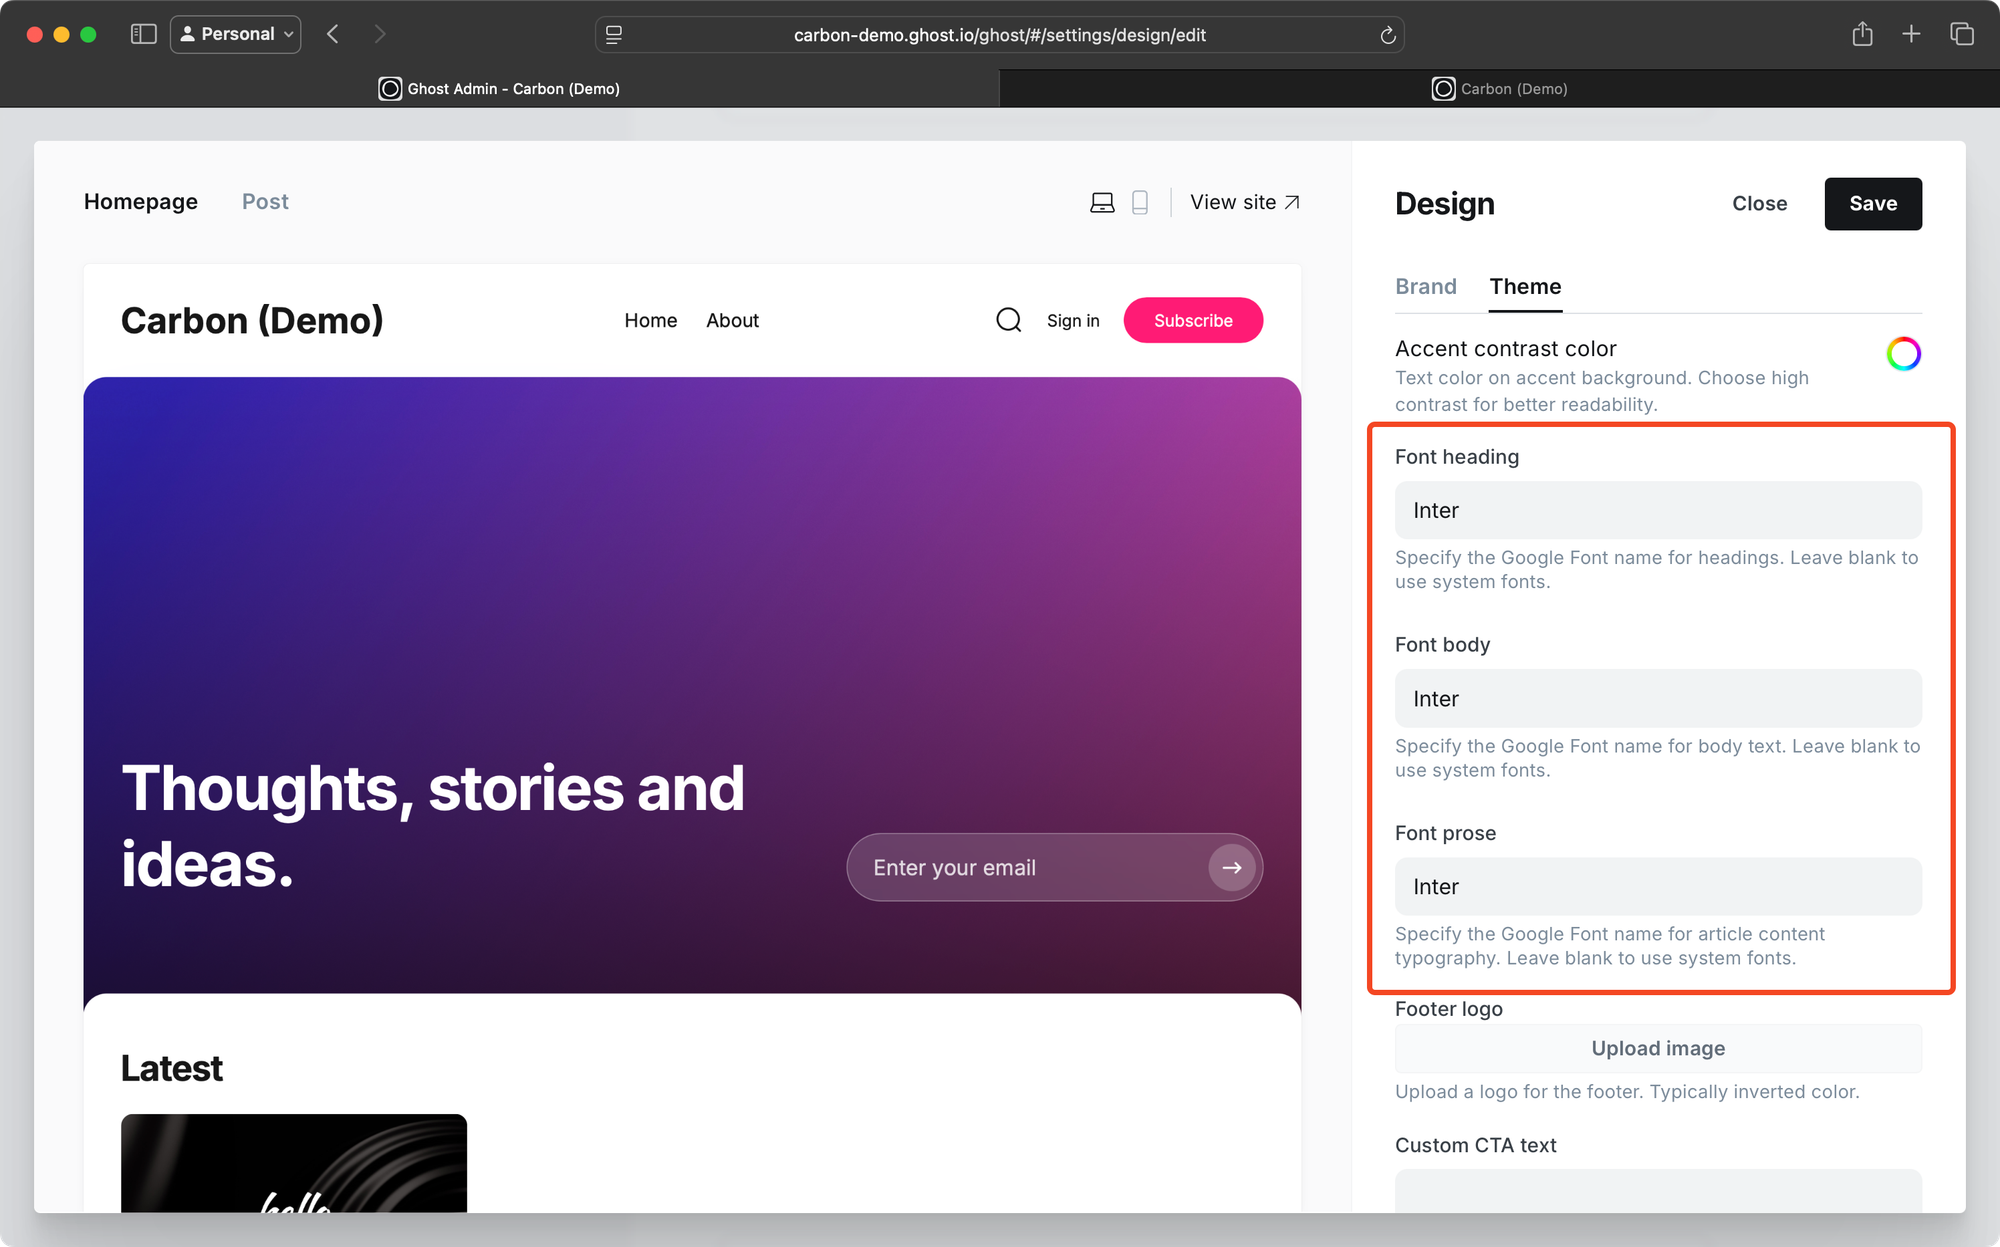
Font Configuration
Carbon theme uses a two-step font system that gives you full control over typography so you can chose from over 1500 fonts.
How fonts work
- Go to theme customization
yoursite.com/ghost/#/settings/design/editin your Ghost admin. - Under the Brand tab, set the “Heading” and the “Body font” to Theme default. This tells Ghost to use whatever font the theme provides instead of Ghost’s built-in options.
- Choose your custom font - Then, go to the Themes tab and under Font heading/body/prose, enter any Google Font name. Carbon will automatically load and apply this font across your site.
Why set the font to Default first?
Well, Ghost normally overrides whatever font the theme wants to use. By setting the Ghost font to “Default” first, you're essentially telling Ghost to step aside and let the theme handle the typography. Only then can your theme pick up the custom Google Font you’ve selected.
If you skip step 1 and leave Ghost set to a specific font, the custom Google Font selection won’t work - Ghost will always win that battle.
Adding custom fonts
- Go to Google Fonts and find a font you like
- Copy the font name exactly as it appears (spaces and all)
- Paste it into your theme settings
Examples:
RobotoOpen SansPlayfair DisplaySource Code Pro
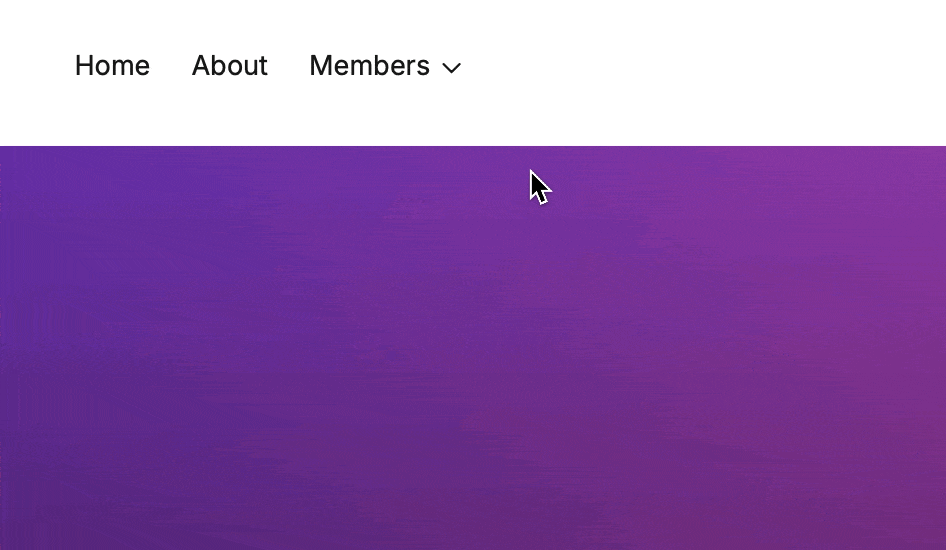
Dropdown menus
Carbon comes with a custom feature to create dropdown menus easily for your header navigation.
All you have to do is add the minus sign (-) in front of the items in Settings > Site > Navigation and a hashtag (#) to the parent URL.
Items having the - sign will be added as subitems to the previous navigation item. Example:
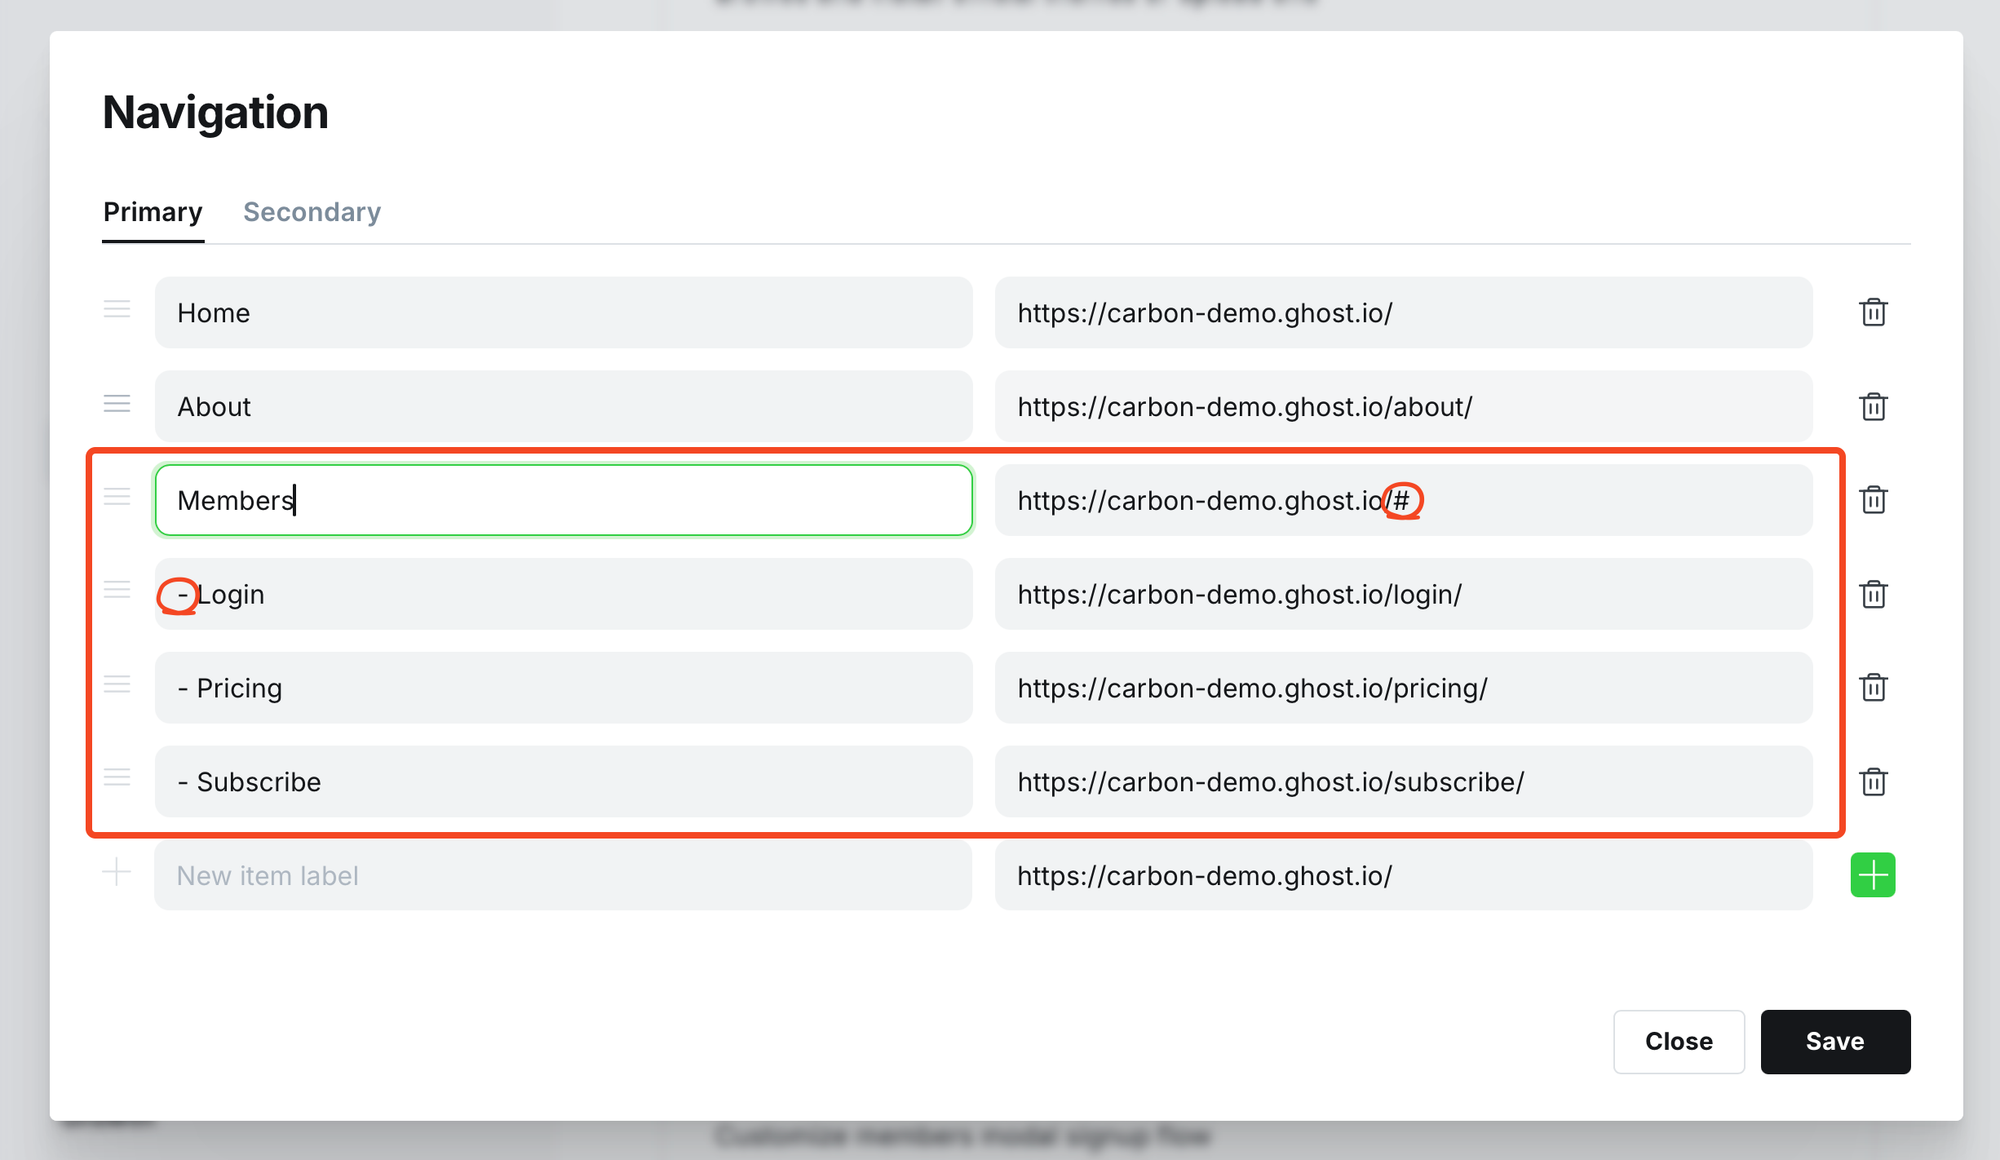
This will yield:
Social links
Social links appear in the footer by default. Ghost allows you to add social links for Facebook and X (Twitter) in Settings > General settings > Social accounts.
Additional platforms
Carbon comes with support for additional platforms:
- Threads
- Bluesky
- Mastodon
- Discord
- GitHub
- Telegram
- TikTok
- YouTube
To enable any of these platforms, add the following code to Settings > Advanced > Code Injection > Site footer:
<script>
  socials.youtube = 'https://youtube.com/vlogbrothers'
</script>
Replace youtube with your desired platform and update the URL accordingly.
Translations
The theme includes English by default (en.json) and supports these additional languages:
- 🇩🇪 German (
de.json) - 🇪🇸 Spanish (
es.json) - 🇫🇷 French (
fr.json) - 🇮🇹 Italian (
it.json) - 🇳🇱 Dutch (
nl.json) - 🇵🇹 Portuguese (
pt.json) - 🇻🇳 Vietnamese (
vi.json)
To enable a translation, set your desired language in Settings > General Settings > Publication language.
Table of Contents
Control where table of contents appear across your site with global settings and per-page overrides.
Posts
Global setting: Go to Settings → Theme → Design & branding and click Customize. Under the Theme tab, toggle Show table of contents on or off. This becomes the default for all future posts.
Override for specific posts: Sometimes you'll want different behavior for individual posts. Go to your post editor, click the settings gear, then Code injection, and add one of these to the Post Header:
Hide table of contents:
<style>
  .post-toc {
      display: none !important;
  }
</style>
Show table of contents:
<style>
  .post-toc {
      display: flex !important;
  }
</style>
Pages
Pages don't show table of contents by default since most pages don't need them. But for longer pages that would benefit from navigation (like this one!), go to your page editor, click the settings gear, then Code injection, and add this to the Page Header:
<style>
    .page-toc {
    	display: flex !important;
    }
</style>
Auto-collapse
To auto-collapse non-active TOC child items, add this to your Site Header in Settings → Code injection (applies globally) or to individual post/page headers:
<style>
    ol .is-collapsed {
        display: none;
    }
</style>
Tags
Image
To set an image for a tag:
- Go to Tags > Edit tag
- Click on “Upload tag image”
- Choose an image that’s 1:1 aspect ratio
Featured Tags

Tags can be featured as categories in the footer (left) or as “Quick links” in the home feed. To set a tag as featured:
- Find the tag slug under Tags > Slug
- Add it to Design > Theme > Featured tags. To add multiple tags, separate them by commas with no spaces (e.g.,
science,tech,life). Limit to 3 tags for best results.
For Developers
Carbon is built with Tailwind, Motion, and plain ol’ Javascript. It uses Vite for the development environment.
To start local development:
- Install Ghost locally
- Go to
content/themesfolder in your Ghost instance and create a symlink to the theme copy. Example:ln -s path/to/carbon ghost-local/content/themes cdinto the theme folder- Run
npm installto get all the required dependencies - Run
npm run dev& restart your Ghost instance
Happy editing!
More help?
If you need any help or custom development work, shoot a message at hello@driff.org! We get many requests, but maybe open to consignments if it's a good fit :)
PS: this has nothing to do with anything, but I didn’t knew where to put this so I’ll just add it here: we share 10% of our revenue to help feed underprivileged kids in India, so thank you for your business and helping create some positive change. You rock!!